![]()
![]()
![]()


The followings are the explanation of the analog output.
1. Torque voltage output
The analog voltage of torque is outputted from the TRQ OUT connector on the rear panel. The output voltage of capacity value of the torque detector set in "Entering settings" is ±10 V.
Output voltage |
±10 V |
|---|---|
Output connector |
C02 type (BNC) connector |
Appropriate load |
10 kΩ or more |
Time constant |
63 ms/500 ms switching |
At the time of shipment, the time constant is set to 500 ms. If the time constant for analog output of the "Entering settings" setting item is switched, time constant can be changed to 63 ms.
|
|
|
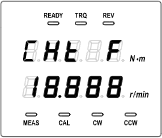
- 3. Measure the output voltage using the digital voltmeter and perform zero adjustment by setting the value in the TS-2700 in the unit of V. Setting range:0 to ±0.999
- ·The LED indicator which can be input the value blinks.
- · Move the input position (digit) with the > key.
- ·Change the numeric value with the ^ key. "-" can be displayed with the MENU key.
- 4. When you establish the setting using the ENTER key, the full scale adjusted voltage is displayed.
|
|
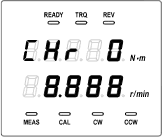
- 5. Measure the output voltage using the digital voltmeter and perform full scale voltage adjustment by setting the value in the TS-2700 in the unit of V.
- Setting range:9.000 to 10.999
- ·The LED indicator which can be input the value blinks.
- · Move the input position (digit) with the > key.
- ·Change the numeric value with the ^ key.
- ·Only 9 or 10 is displayed in the fourth and fifth digits. Each time you press the ^ key at the fourth digit, 9 to 10 are displayed alternately.
- 6. Establish with the ENTER key.
- 7. Press the MEAS/CAL switch to indicate the MEAS LED.
- 8. Start measurement.
2. Rotation voltage output
Rotation analog voltage is outputted from the REV OUT connector on the rear panel. The output voltage of rotation capacity value of torque detector set in "Entering settings" is 10 V.
| Input frequency range | 1 Hz to 100 kHz |
| Output connector | CO2 type (BNC) connector |
| Appropriate load | 10 kΩ or more |
| Time constant | 63 ms |
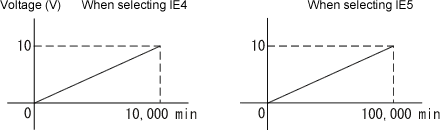
<Note> The accuracy assurance of the input frequency is 10 Hz or more. The number of rotation is relied on number of rotation signal pulse and input frequency. For example, when the rotation signal pulse is 60 P/R and input frequency is 10 HZ, the number of rotation is 10 r/min. When the rotation signal pulse is 60 P/R and input frequency is 1 Hz, the number of rotation is 1 r/min. |
|
|
|
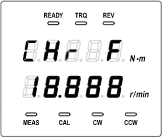
- 4. Measure the output voltage using the digital voltmeter and perform zero adjustment by setting the value in the TS-2700 in the unit of V.
- Measurement range:0 to ±0.999
- ·The LED indicator which can be input the value blinks.
- ·Move the input position (digit) with the > key.
- ·Change the numeric value with the ^ key. "-" can be displayed with the MENU key.
- 5. When you establish the setting using the ENTER key, the full scale adjusted voltage is displayed.
|
|
- 6. Measure the output voltage using the digital voltmeter and perform full scale voltage adjustment by setting the value in the TS-2700 in the unit of V.
- Setting range:9.000 to 10.999
- ·The LED indicator which can be input the value blinks.
- ·Move the input position (digit) with the > key.
- ·Change the numeric value with the ^ key.
- ·Only 9 or 10 is displayed in the fourth and fifth digits. Each time you press the ^ key at the fourth digit, 9 to 10 are displayed alternately.
- 7. Establish with the ENTER key.
- 8. Press the MEAS/CAL switch to indicate the MEAS LED.
- 9. Start measurement.
Revised:2006/05/22