![]()
![]()
![]()


1. Built-in battery charging
The sound level meter incorporates a lithium battery (built-in battery) for memory backup. With this battery, measured data and clock data can be retained for about five months. The built-in battery is charged automatically when the power of the sound level meter is turned on. Immediately after purchasing, please follow the steps below to charge the built-in battery and set the calendar.
After purchase
Immediately after purchasing, the built-in battery has been either fully discharged or charged to minimum degree. Connect the AC adapter and leave the sound level meter for 24 hours or more with the power turned on. The Built-in battery will be fully charged.
Daily care
If you use the sound level meter for 1 hour or more a week, charging is not necessary. If you use it very rarely, it is recommended that you charge it every three month.
<Notes>
• Immediately after purchasing, be sure to charge the sound level meter prior to measurement. The built-in battery may either be fully discharged or charged to minimum degree.
• The built-in battery used in the sound level meter was designed so that it withstands approximately 1000 cycles, each starts at full charge and ends at complete discharge. However, it is recommended that important data be printed out or transferred to a personal computer.
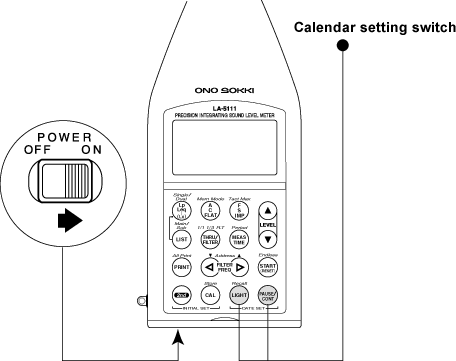
2. Calendar setting (DATE SET)
After completion of charging of the built-in battery, follow the steps below to set the time.
◆Operation procedure
1. Turn off the power switch of the sound level meter.
2. Display the calendar setting screen. Turn on the power switch while holding down the [LIGHT] and [PAUSE/CONT] switches.
3. Move the cursor to the item to be set (year/month/day/hour/minute). Press the [FILTER FREQ] switch to move the cursor. The setting value is changed when you press the [LEVEL] switch.
4. Press the panel switch [START]. The set calendar data are stored in memory and at the same time, the normal measurement screen resumes.
3. External equipment connection confirmation
Option model name is displayed in the calendar setting screen. The option which has been installed, * mark on the right of the model name.
|
Revised:2001.10.12