![]()
![]()
![]()


Calendar function setting
The calendar function (clock) is incorporated to the LA-1240/1250/1350/4350. The current time and measurement start time (at the time of the measurement result display and memory recall) can be displayed on the LCD screen or outputted from the printer by the calendar function.
|
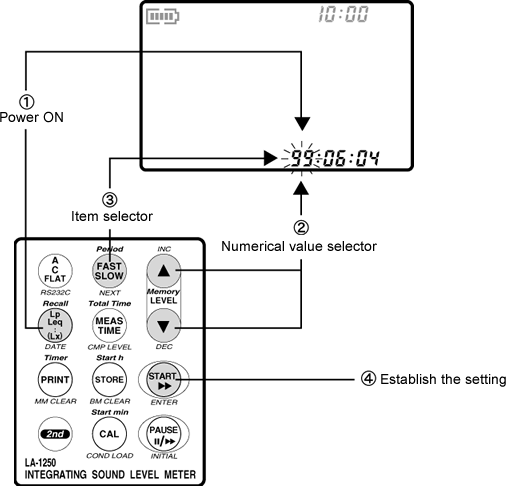
Procedure of resetting the date
Immediately after purchasing, the date may not be displayed correctly. We recommend you to reset the date (year/month/day/hour/minute/second) after charging the built-in battery.
1. Turn ON the power while pressing the panel switch [Lp/Leq (DATE)]. The date (xx:xx:xx) blinks on the LCD screen.
2. Press the panel switch [LEVEL (▲·▼)] to set the numerical value.
3. Setting item (blinking) is changed by pressing the panel switch [FAST/SLOW (NEXT)]. It is changed in the following order; Year > Month > Day > Hour > Minute > Second.
4. After setting completion, press the panel switch [START (ENTER)]. The date is reset and the Sound Level Meter is activated.
The built-in clock includes an error of ±1 minute a month at 25 °C temperature. The sound level meter incorporates two separate clocks for calendar and measurement elapsed time. Although the results of calendar time and measurement elapsed time may be different, this is not caused by failure.
Revised:2002.01.09