
![]()
![]()
![]()


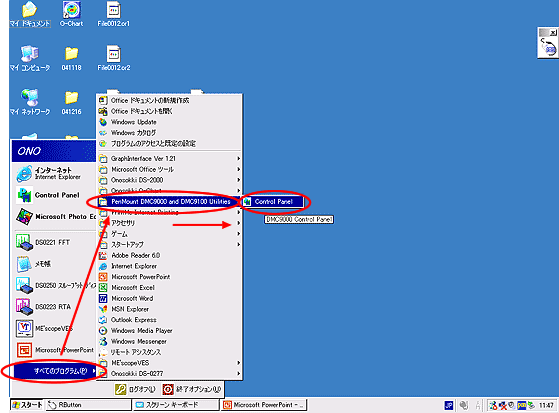
1. Activate utilities
Select "All program" from start menu and click "Control Panel" in "PenMount DMC900 and DMC9100 Utilities" in the list. "PenMount Control Panel" is opened Then click the leftmost tab "Calculate".

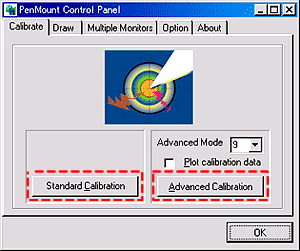
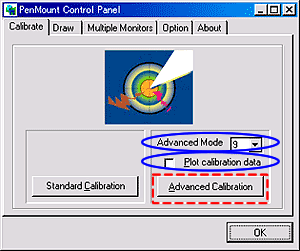
There are two ways, "Standard Calibration"(Standard)and "Advanced Calibration"(extension). If it is not enough with "Standard Calibration"(Standard) for matching the point and position, continue "Advanced Calibration"(extension)operation.
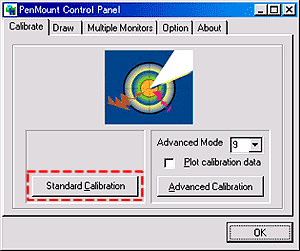
2. Operate "Standard Calibration"
Select "Standard Calibration" shown below.
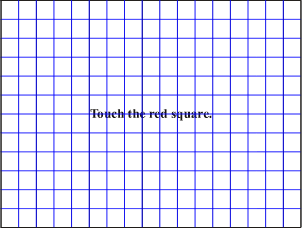
Touch panel of CF-3600 changes to "Touch the red square" screen and a blue arrow which has a red circle on the front edge appears on the screen in order. See below. Touch red point on the edge of a blue arrow, from the 1st to 5th in order. Using a touch pen dedicated for touching panel is recommended. Do not use the pen or others with a spike at the edge such as an mechanical pencil. This may cause scratch or break the touch panel.
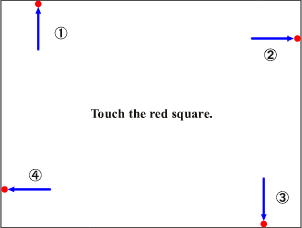
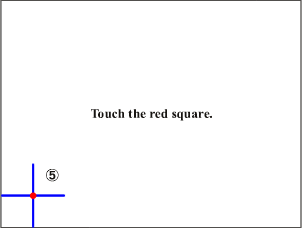
Touching the 1st button through 5th in order makes adjustment automatically and return to the original screen (Screen before pressing Standard Calibration button).
3."Advanced Calibration" (extension) operation
When the "Standard Calibration" is not enough, "Advance Calibration" is executed in the order below.
As you see down below, default of the numerical value on the right of the "Advanced Mode" is "9" and execute calibration at 9 points on the screen. When "Plot calibration data" is checked, calibration result is displayed after calibration ends.
Select "Advanced Calibration". Touch panel of CF-3600 changes to "Touch the red square" screen and a blue arrow which has a red circle on the front edge appears on the screen in order. If the numerical value of "Advanced Mode" is default at "9", touch a red point in the center from 1st to 9th in order. Using a touch pen dedicated for touching panel is recommended. Do not use a pen or others with the spike at the edge such as mechanical pencil. This may cause scratch or break touch panel.
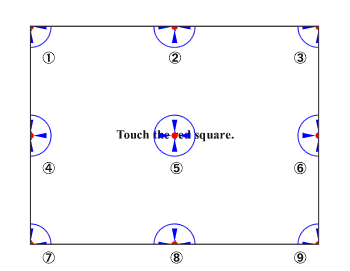
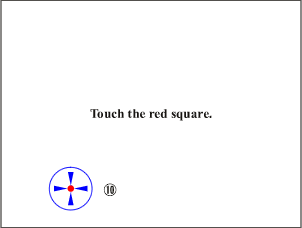
Touching in order makes arrangement automatically. Click the 10th red point on the screen at last will return to the initial screen (a screen before pressing Standard Calibration button).
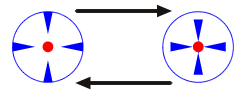
The circle which there is a red colored small point will be animated from the left figure to right figure as below until touching the screen.
When "Plot calibration data" is checked, the result of calibration is displayed after calibration ends.
The grid line shown above is the result of calibration. If it is unmatched so large between the point touched and the position of the soft on the screen, the line of the blue grid is displayed as it is curved. Even if it looks curved with no problem in using, calibration is completed.
Touching the screen will return to the initial screen (a screen before pressing Standard Calibration button).
Revised:2006.06.19
